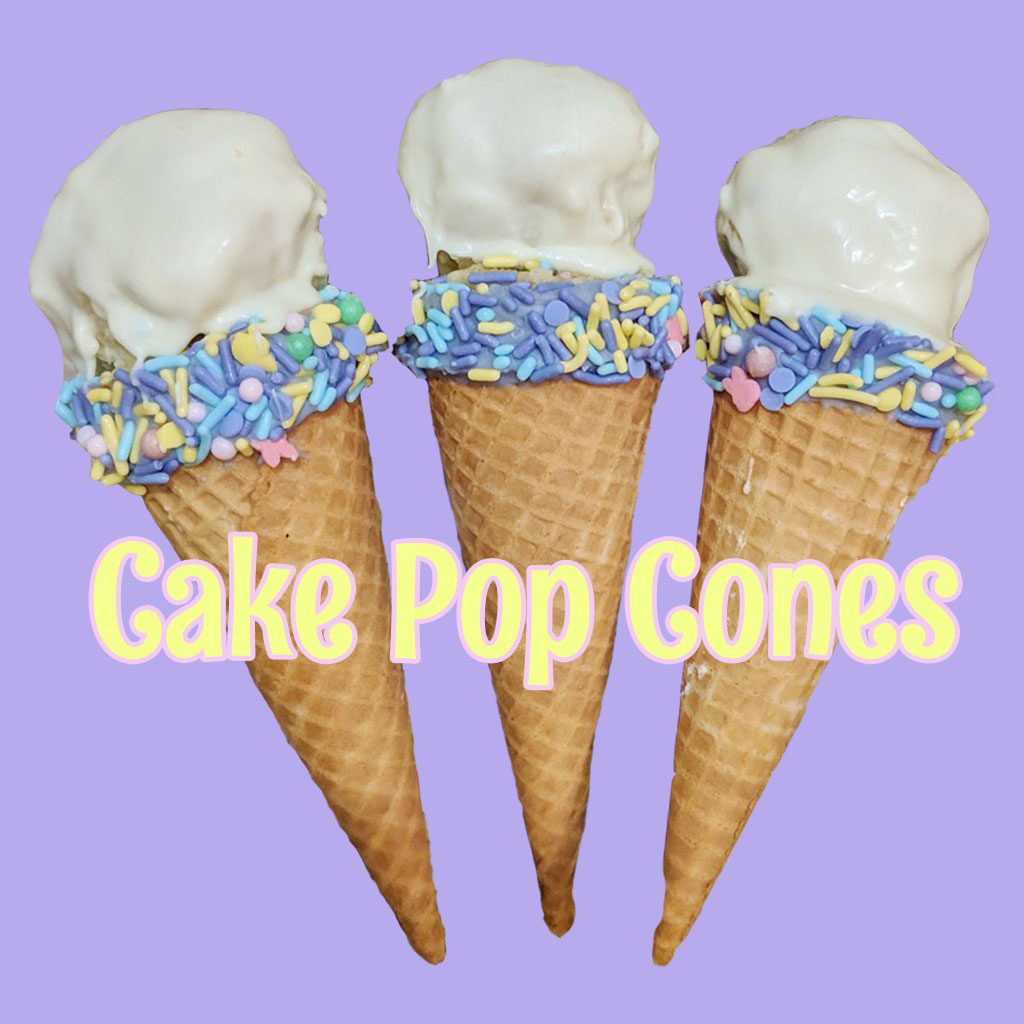
Cake Pop Cones
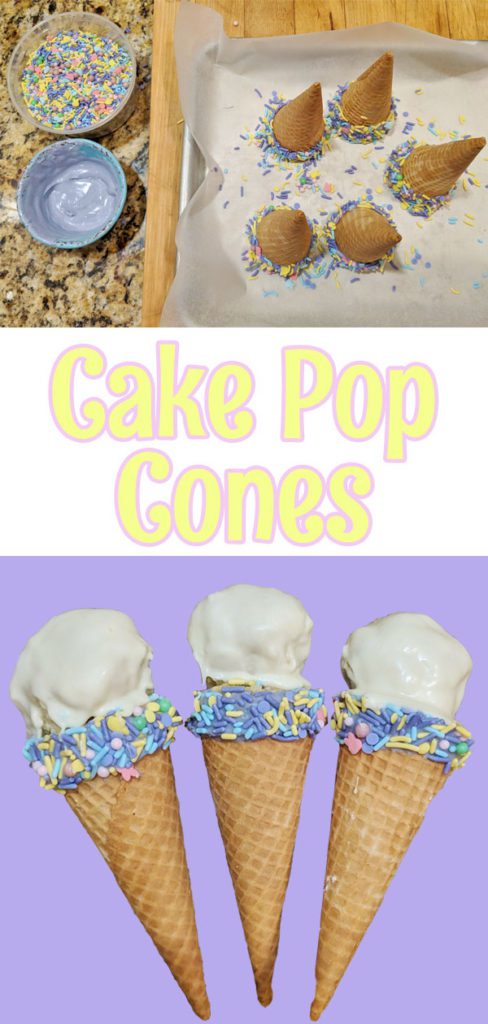
These Cake Pop Cones are SUPER YUMMY! I kind of winged this and they turned out pretty great. When I finished, I told myself I would only have a bite but I ended up eating the whole cone! This is a super cute dessert for Easter and spring celebrations.
You will need:
Cake – We used boxed white cake
Frosting – We made our own. You will need approximately 1 16 oz container
Ice Cream Sugar Cones
Candiquik or chocolate melts
Sprinkles – I found this adorable mix at Walmart for $3
Food coloring – if you want to color the candyquik
Something to hold the cones upright (I forgot about this!)
Instructions:
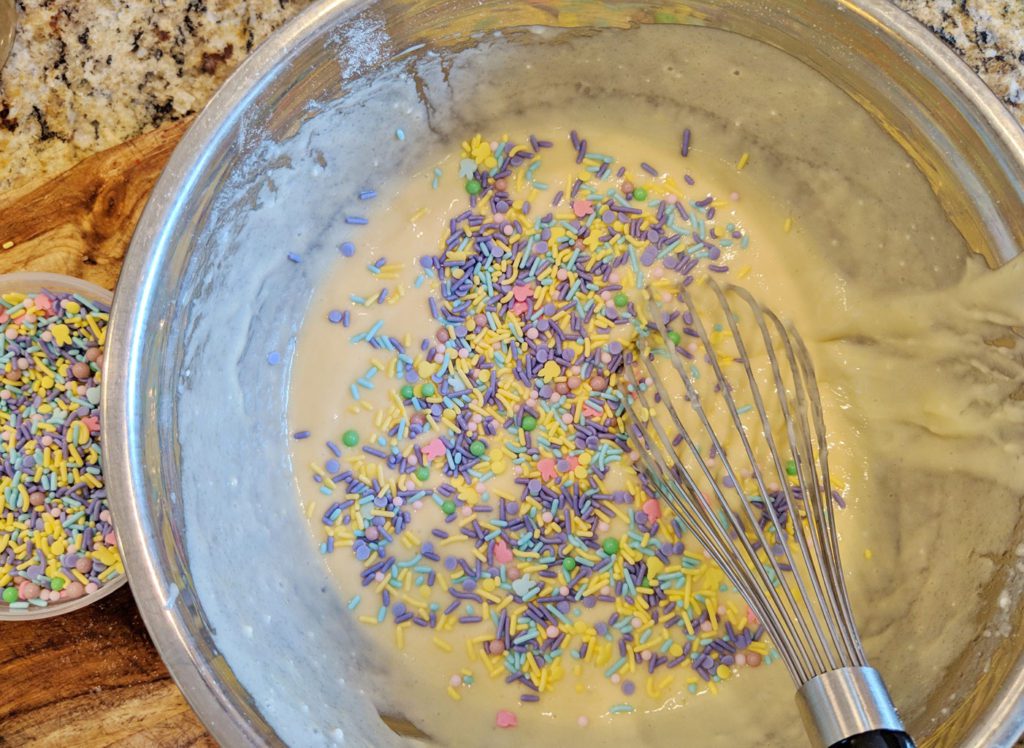
1. Make your cake. I added our sprinkle mix to the batter to add some pretty confetti color to our cake.
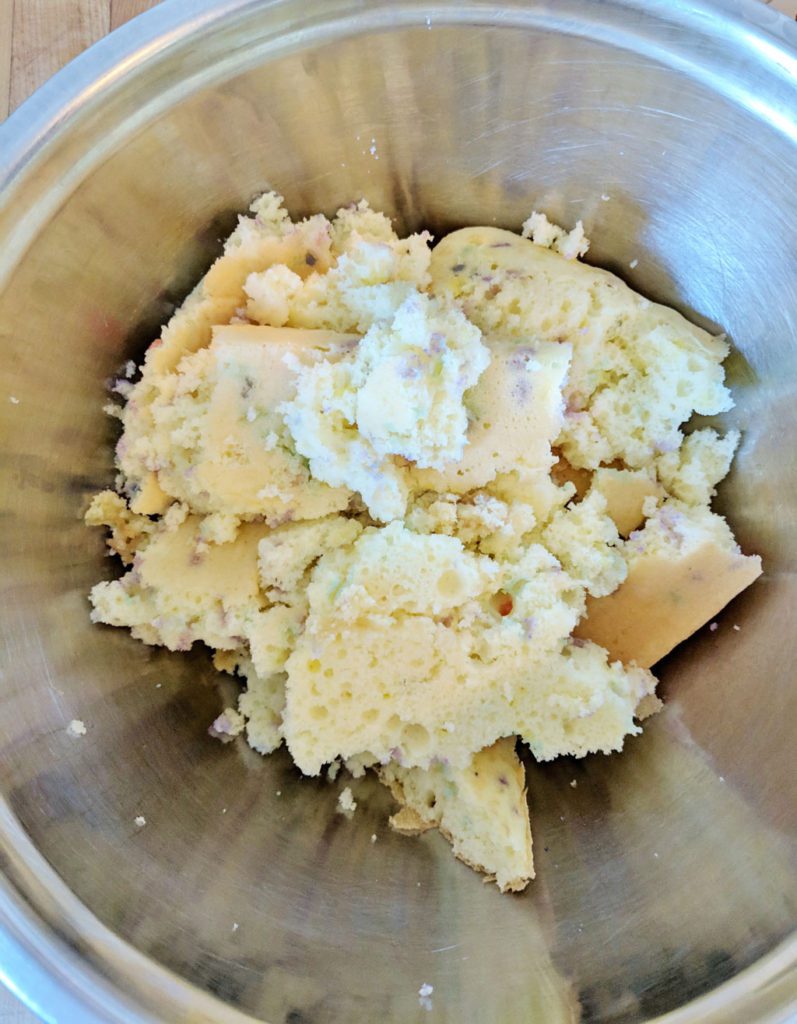
2. Once it’s cooked, break up the cake in a bowl. You’ll want to make sure there are no big clumps of cake so your cake pop mixture is smooth.
3. Add frosting to your cake. I used about the same amount as 1 – 16 ounce container of frosting. Some frostings are thicker than others. Add a little at a time so it doesn’t get too wet and mushy.
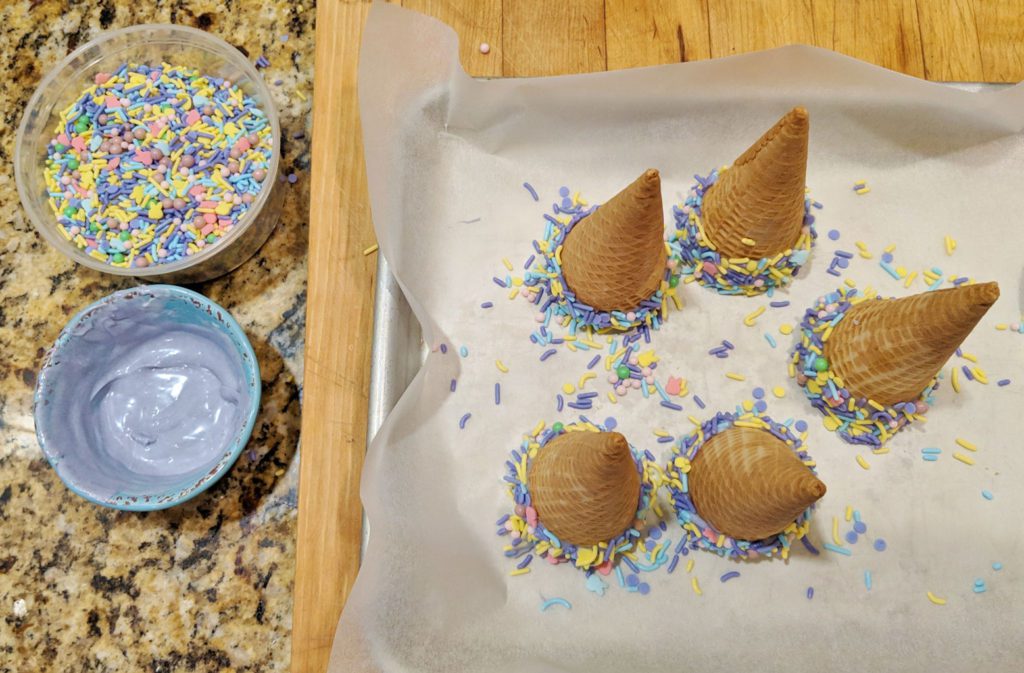
4. Dip your cones into the candiquick and twist. Sprinkle the sprinkles over the chocolate. I poured some candiquik into a small bowl and colored it purple with food coloring.
Candiquik is my greatest discovery. It’s so much easier to work with than chocolate melts. You can reheat it multiple times and it tastes AMAZING! I use candiquik on My Favorite Rice Krispies.
To color candiquik – use gel or oil based food coloring. To color chocolate – use oil based food coloring only.
*Tip* Make sure your candiquik is nice and warm so it doesn’t harden and become difficult to work with. You may need to warm it as you go.
*Tip* Don’t push your cone into the sprinkles. It will mess up the candiquik and not hold well.
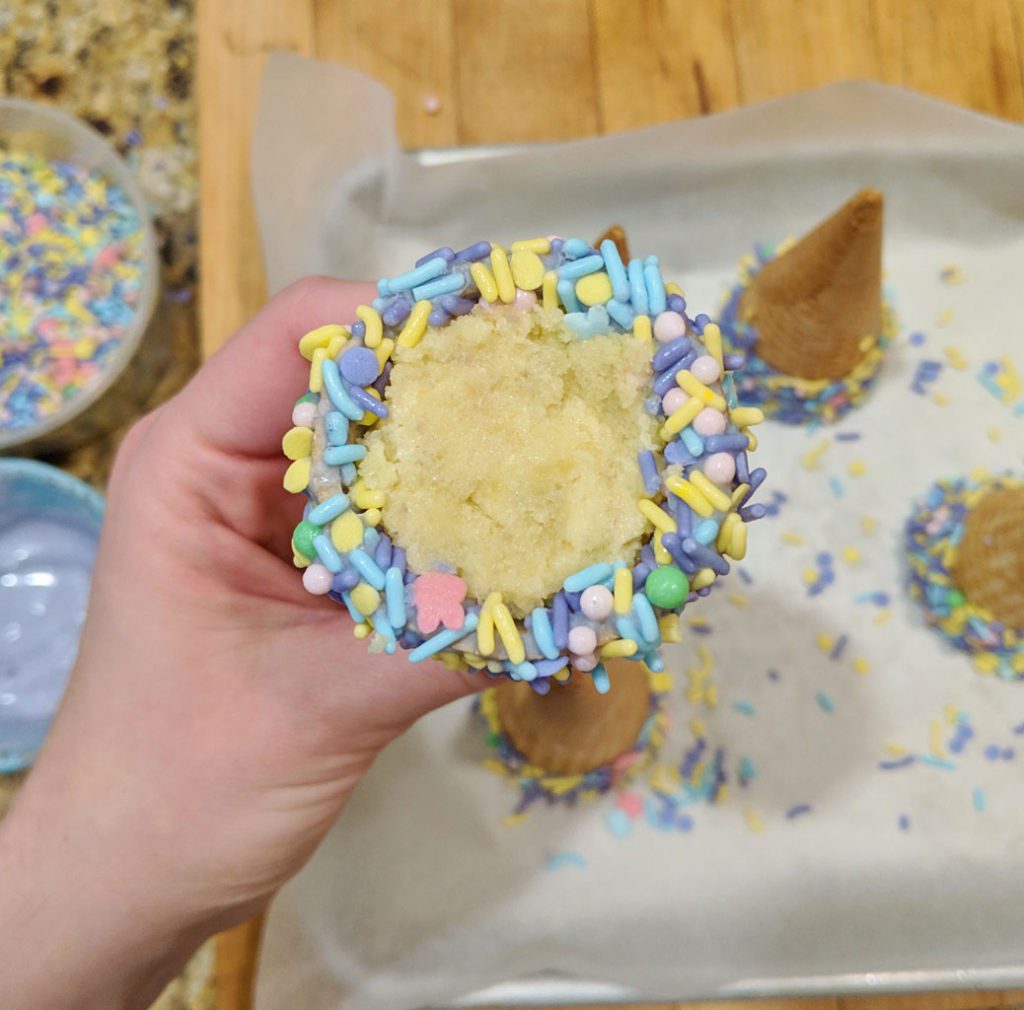
5. Once the candiquik hardens, fill your cones with cake pop mixture.
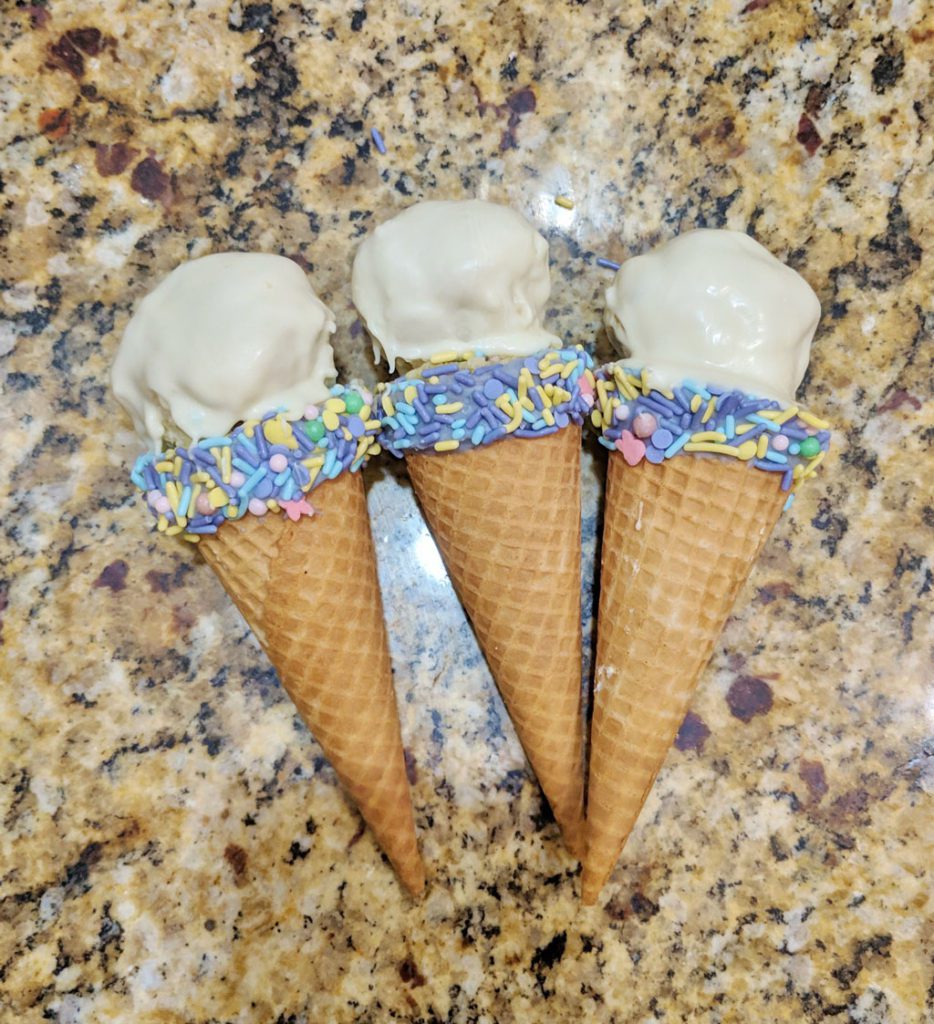
6. Roll cake pop mixture into a ball and cover it with candiquik. I used a small dish, put the ball in it and poured the candiquik over the ball. Then, I used a spoon to make sure it was covered and put it on the cone.
*Tip* Cold cake pop mixture is easier to handle!
*Tip* Use a lot of candiquik so that it pools under the ball when you put it on the cone. It gives it more of an ice cream look.
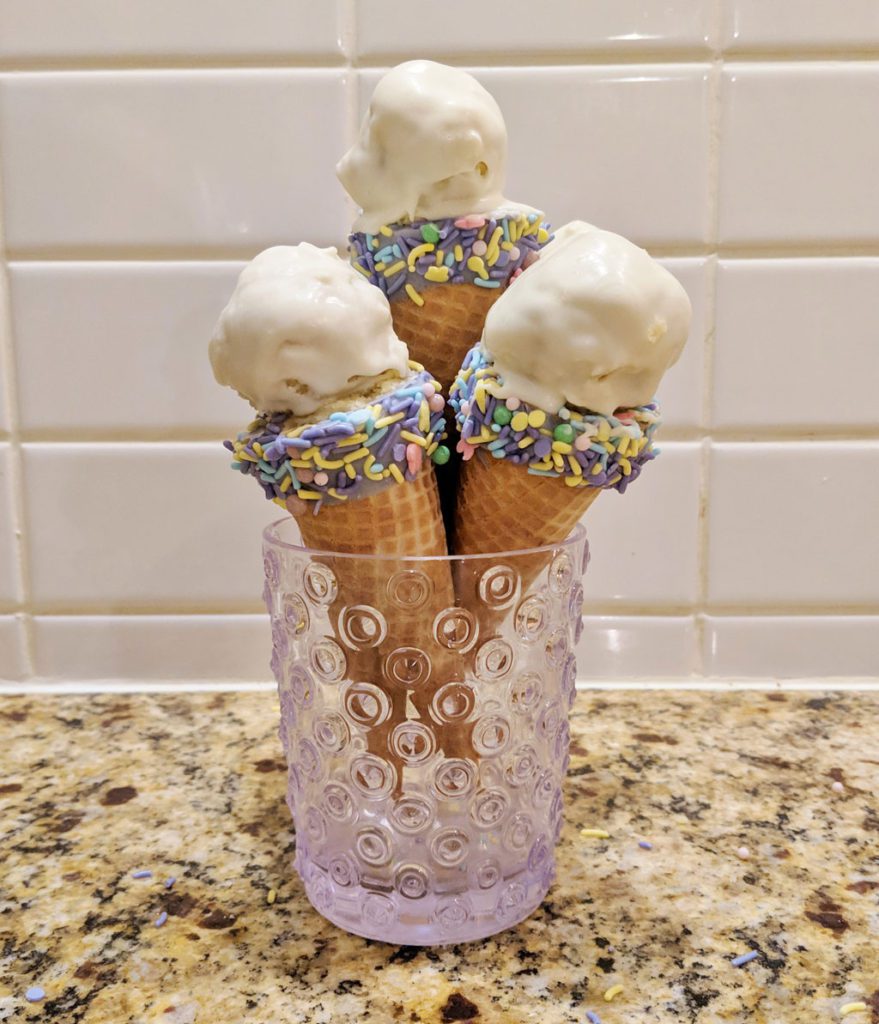
Make sure to have something to hold the cones upright. I was using the toaster and a few mini measuring cups to hold the cones. Poor planning! I actually ordered a Betty Crocker Ice Cream Cone Cupcake Baking Rack after I did this.


YUM! Comment below ↓ if you give these a try!


Related Posts

Puppyschooling – Homeschooling With A Puppy
April 21, 2024
EASY 2 Story Gingerbread House & Template
December 18, 2023